

Installation Guide
INSTALLATION GUIDE
How to Install Rubber Gym Flooring:
If you are building your own gym space, whether a home gym in your garage or a large commercial gym, having the right kinds of floors is crucial.
One of the best types of floors for any gym environment is a rubber floor.
If you want to install you own rubber flooring then please see our installation guide below to learn how to stagger joints for added stability, when to use glue for larger areas, and ensure your gym floor is installed for optimal performance and safety.
Step 1 – Measure and plan
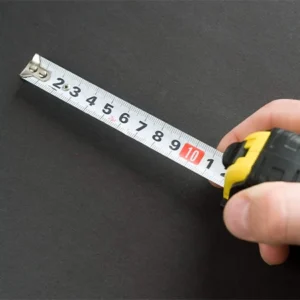
Begin by measuring your gym space accurately. This helps you determine the number of tiles needed and ensures an efficient layout. You will want to add an extra 5% to 10% to the floor area to allow for wastage and mistakes. Most tiles are sold in either 1metre or 0.5 metre squares, so it is easy to calculate your requirements.

Step 2 – Prepare the Subfloor
Ensure the subfloor is clean, dry, and level. Remove any debris, dust, or grease. A clean subfloor ensures a smoother installation process. Plus, if you do need to use any glue, then it will create a stronger bond.
If there is any doubt about the stability of the subfloor area, do not proceed until the area has been checked by a qualified construction worker. For instance, if the floor underneath is extremely damaged, warped, cracked, or anything else of the sort, a rubber floor may not be ideal. This is especially the case if you do not plan to perform any repairs first.
Step 3 – Lay the First Row
Start in one corner of the room. Place the first tile tightly against the wall. Continue laying tiles along the wall, making sure each tile fits tightly against the next.
Step 4 – Stagger the Joints
For each new row, begin with a half tile or a cut tile to create a staggered pattern. This technique increases the floor’s stability and reduces the likelihood of gaps forming over time.
Step 5 – Secure the Tiles
For areas less than 10 meters wide, a good quality heavy tile should stay in place without glue. For larger areas, glue every sixth row to ensure the flooring remains stable. Apply adhesive to the subfloor where the row will be placed, then press the tiles firmly into the glue. You can also look to use a good quality double-sided sticky tape.
Step 6 – Finishing Touches
Once all rubber tiles are in place, walk over the entire floor to ensure all tiles are securely set. Trim any excess material around the edges with a utility knife for a clean finish.
By following these steps, you will have a durable, professional-looking rubber gym floor that enhances your workout space.

Step 7 – How to Cut Rubber Gym Flooring Tiles
Cutting rubber gym flooring tiles is a straightforward process that ensures a precise fit around edges and obstacles. Here is how to do it:
Measure and Mark:
Secure the tile:
Cut with a utility knife:
Apply Firm Pressure:
Smooth Edges:
The Best Conditions to Install Rubber Flooring
Although rubber floors can be placed virtually anywhere, there are certain conditions you first want to meet.
Primarily, to install rubber floors properly, the floor below should be flat. The flatter the floor is, the easier the rubber floor will be to install.
Moreover, you do not want any kind of bumps or dips in your rubber floor, because that can be dangerous when customers are exercising.
When you install rubber floors, the surface needs to be dry. If the surface is not dry, the moisture will stay trapped under the rubber once it is installed leading to the opportunity for Mould and Mildew and can even degrade the subfloor below.
Rubber Gym Floors and Subflooring
Something you need to be familiar with is the subflooring underneath the rubber tiled floor.
A lot of people wonder whether it is necessary to use a subfloor, and if it is necessary, which type to use.
Using subflooring is recommended. This is especially the case if you have delicate or fragile materials underneath.
For instance, if you have a tile or stone floor, these can be cracked and damaged easily. To avoid this from happening, installing a subfloor between it and the rubber is recommended.
A cushioned surface to absorb impact from your exercise is crucial if you plan on the floor underneath staying in good condition. A cushion type of subfloor is recommended for any kind of fragile surface.
Regarding wooden floors, using a layer of craft paper or something similar is recommended to use as subflooring. Rubber mats are Black, and over time, colour may seep into the hardwood floor and cause stains.
Rubber may also react with some wood finishes, causing damage to both the wood and the rubber.
To avoid moisture issues, a subfloor may also be used when installing rubber flooring over concrete.